Quick & Flavorful Homemade E-Liquid in 10 Minutes
Ever wanted delicious e-liquids at home? In just 10 minutes, craft your favorite flavors with this simple guide to vaping flavorful e-liquid!

- Recipe Overview
- Key Benefits
- Transition to Ingredients
- Your Essential Ingredients Guide to Vaping
- Quick & Flavorful Homemade E-Liquid in 10 Minutes
- Pro Tips & Secrets for Quick & Flavorful E-Liquid
- Perfect Presentation
- Storage & Make-Ahead Secrets
- Creative Variations for Your E-Liquid
- Complete Nutrition Guide
- Expert FAQ Solutions
- Wrap-Up
- Recipe Card
Ever found yourself wishing you could whip up your favorite vape flavor in a dash? oh man, i know i have! picture this: there i was, standing in a tiny kitchen, surrounded by the sweet aroma of fruits and candies, dreaming about vaping flavorful e-liquid in 10 minutes .
Now that’s the kind of kitchen magic i’m all about! turns out, with a few simple ingredients and a bit of ensoiasm, you can create your very own homemade vape flavors .
And let me tell you, it feels awesome knowing exactly what’s going into that vape juice.
Creating your own e-liquid is like painting your own masterpiece, but instead of a canvas, you’ve got a bottle of pg and vg (that’s propylene glycol and vegetable glycerin for the uninitiated folks).
With just a few drops of food-grade flavoring options , you can be mixing up your personalized blend in no time.
So, buckle up as we dive into the world of diy vape juice that’s not only quick but also super satisfying!
Recipe Overview
Let’s take a quick trip down memory lane, shall we? the art of creating e-liquids began when vaping took off as an alternative to traditional smoking.
It wasn’t long before diy ensoiasts started blending their own flavors. now, it’s all the rage! and why not? it's a fun way to create exciting vape flavor combinations that are tailored just for you.
Now, if you’re looking to hop on this trend, the good news is that this recipe is easy-peasy ! you’ll need just 10 minutes to craft about 30 ml of your flavorful concoction.
Plus, you don’t have to break the bank—most ingredients won’t cost you much at all. honestly, you can make this work for budget vibes or go all out.
It’s your call!
Key Benefits
So, why should you roll up your sleeves and give this a shot? well, for starters, there are some serious health benefits associated with making your own juice.
By using quality ingredients like pg and vg, you can ensure your e-liquid is safe, which is a crucial part of vaping safety tips .
One of the coolest parts? you can whip up custom e-liquid recipes for every occasion! maybe you’ve got a game night planned, or a cozy movie marathon in mind.
Having a tailored vape that complements the vibe can really take the experience to the next level. plus, the rich flavors you get from your own blending may outshine those runs-of-the-mill store-bought options!
Another little secret? flavor blending techniques make the whole process rewarding. you’ll discover how to balance sweetness and freshness like a pro.
And hey, don’t be afraid to adjust that flavor intensity ! you want your vape experience to be just right, right?
Transition to Ingredients
Before you start pouring and mixing, let’s quickly cover what you’ll actually need to get started on this adventure. you’ll soon be bringing your own e-liquid to life in just 10 minutes! gather around, friends, because it's time to whip up something amazing.
Here’s the lowdown on ingredients, and i promise it’s simpler than it sounds. ready to dive in? let’s do this!
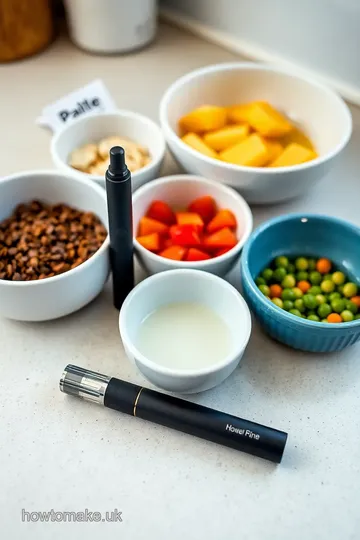
Your Essential Ingredients Guide to Vaping
Hey there, vaping aficionados! let’s chat about how to create quick & flavorful homemade e-liquid that you can whip up in just 10 minutes.
I mean, who doesn't love a fresh mix? this guide is all about the must-have ingredients, seasonings, and tools you'll need to embark on your diy adventure.
Buckle up, because we’re about to make some vape magic!
Premium Core Components
When it comes to your base, you're going to need a couple of heavy hitters. you want a good blend of propylene glycol (pg) and vegetable glycerin (vg) .
Here’s how to get your measurements just right:
- For the Base:
- 15 mL Propylene Glycol (PG)
- 15 mL Vegetable Glycerin (VG)
Quality indicators: Look for clear liquids without any cloudiness. If it looks a bit funky, skip it!
Storage guidelines: keep these babies in a cool, dark place. these essential ingredients have a shelf life of about 1-2 years if stored properly.
And trust me, freshness is key, especially if you want those flavored e-liquid recipes to shine.
Signature Seasoning Blend
Now that we’ve got the base down, let’s dive into the fun part—flavors! Finding the right food-grade flavoring options is crucial. You can go wild and mix it up:
- Essential spice combinations: Pair sweet with savory or fruity with mint. For instance, strawberry and menthol? Oh my gosh, it’s a game changer!
- Flavor enhancers: Vanilla and caramel synergize beautifully if you're going for something dessert-like.
Feeling adventurous? try a bit of cinnamon with apple flavoring; it brings that cozy vibe straight to your vape. and hey, don’t hesitate to explore those regional variations.
Think “homemade vape flavors” from classic american desserts to exotic fruits.
Smart Substitutions
Let’s be real; sometimes, you can’t find that special flavor or ingredient. No worries! Here’s the scoop on common alternatives :
- If you’re out of PG, use more VG. It might make your mix thicker but still delicious.
- Dietary modifications: Want a nicotine-free vape? Just skip the nicotine concentrate entirely!
Emergencies happen, so keep quick e-liquid recipes in mind. If you’re craving mint but only have menthol, go for it! Use what you’ve got to make that sweet vape creation happen.
Kitchen Equipment Essentials
Alright, let's talk tools. You don’t need fancy gadgets, but a few essentials can make your life easier:
-
Must-have tools:
- A measuring syringe (or graduated pipette)
- Mixing bottles (30 mL or larger)
- A funnel (if you’re feeling extra tidy)
-
Preparation tips: Always wear gloves when handling nicotine—safety first, folks!
Your goal is to mix, not to stress. So, keep your space clean and your tools ready to go.
The Final Notes
Now that you have the lowdown on creating e-liquids and mixing techniques for e-liquids, you’re prepped and ready. Just dive into the fun part—creating your own flavor combinations! With exciting vape flavor combinations at your fingertips, why not try a banana and peanut butter combo? Sounds odd, but trust me; it’s fantastic!
Always remember to let your e-liquids steep a bit to let those flavors meld together. And don’t forget to label each bottle—it saves you from the guessing game later!
Ready to embark on this DIY vaping journey? Let’s kick it off with the easiest instructions, where you’ll create your own custom e-liquid recipes that wow. Happy mixing!
Quick & Flavorful Homemade E-Liquid in 10 Minutes
Creating your own e-liquid at home sounds a bit like magic, right? but trust me, it’s super simple and ready in just 10 minutes ! whether you're a vaping veteran or a curious newbie, this easy-peasy guide will have you whipping up custom flavors faster than you can say "vape.
" you'll learn about diy vape juice , get to explore some exciting flavor combinations, and have fun in the process.
Essential Prep Steps
Before you start, let’s talk about mise en place —that fancy french term for getting everything in its place. gather your ingredients! you’ll need some propylene glycol (pg), vegetable glycerin (vg), and your favorite food-grade flavoring .
Oh, and don’t forget a measuring syringe. having everything handy keeps your workstation clean and organized, making the process smooth like your favorite vaping flavor.
Time management is key here. Once you’ve got everything together, you’ll fly through the steps. Keep an eye on the clock so you can have your tasty e-liquid ready in a flash.
Safety first! When working with nicotine , always wear gloves. Seriously, that stuff is no joke. Make sure your vape mixing equipment is clean and ready to go—nobody wants a dirty vape!
Step-by-Step Process
Alright, it’s showtime. Grab your mixing bottle and let’s get this party started. Here’s how you do it:
- Prepare Workstation: Clean, clear, and ready for action.
- Measure and Pour Base: Use the syringe to measure 15 mL of PG and pour it into the mixing bottle. Following that up with 15 mL of VG . Nice and easy, right?
- Add Flavoring: Choose your vibe! How about 3 mL of strawberry or a dash of vanilla? Pour it in and vibe out.
- Incorporate Nicotine (if desired): If you’re rolling with nicotine, measure out 1 mL of nicotine concentrate and add it. Make sure you’re careful, okay?
- Mix Ingredients: Cap that bottle and shake it like it’s a maraca for about 30 seconds . You want everything blended nicely.
- Let It Sit: Give it at least 5 minutes to let those flavors marry and intensify. Patience is everything!
- Test the Flavor: Get your vape device ready and take a hit. Adjust the flavors as you wish! More vanilla? Go for it!
- Store: Label your concoction with the flavor and date. Store it cool and dark. Your future self will thank you.
Expert Techniques
Now, let’s spice things up with some expert tips . when you’re creating custom e-liquid recipes, always start with small batches.
It’s a weird feeling, but what if you mix a flavor combo that ends up tasting like grandma’s old perfume? no, thank you! so keep track of your vape juice measurements and notes.
Also, make sure to pay attention to those flavor-blending techniques . Sometimes a little twist can turn your flavor from “meh” to oh wow ! Think about exciting flavor pairings too—berry with mint, anyone?
Success Strategies
Avoid the common pitfalls like adding too little or too much of a flavor. trust me, no one wants to pull that “oops, did i really taste pickle-flavored vape?” moment! stick to the guides for quality assurance and you’ll hit that sweet spot every time.
Lastly, if you’ve got some flavors that need “steeping,” give them some time. Let those flavors develop over a few days. It's well worth it.
So there you have it, one simple method to craft your own e-liquids, all while keeping the process fun! you’re officially ready to dive headfirst into the world of homemade vape flavors .
Additional Information
As you venture into diy vaping, remember to explore the multitude of flavors available. from peach to cinnamon bun, the world is your oyster! keep experimenting with exciting vape flavor combinations and let your creativity run wild.
That’s the beauty of making your own juice—it's about personalizing that perfect vaping experience. happy vaping!
Pro Tips & Secrets for Quick & Flavorful E-Liquid
Creating your own quick e-liquid recipes doesn’t just mean pulling ingredients together. It’s about making something exciting! Here are my personal secret tips to elevate your DIY game and make vaping flavorful e-liquid in 10 minutes smooth and fun:
Chef's personal insights: always remember that not all flavorings are created equal. i love using food-grade flavoring options from brands known for quality.
Trust me; it makes a world of difference when you light up your vape!
Time-saving techniques: keep your workspace organized; it cuts down on fumbling time. a clean space is a happy space, and it speeds up the process.
Plus, you won’t find yourself searching for that one vital measuring syringe!
Flavor enhancement tips: if you want to kick it up a notch, try adding a bit more food-grade flavoring but be cautious – too much can drown out the base.
Start small, then tweak to your heart’s content. oh, and let the e-liquid steep for a couple of days for those complexities to meld together beautifully.
Presentation advice: it might be a liquid, but don’t underestimate the beauty of a well-labeled bottle! a cute label not only looks great but also helps you remember your fantastic blends down the line.
Perfect Presentation
Now for the fun part! Presentation might seem silly for e-liquid, but trust me, it matters:
Plating techniques: although we aren’t plating a dish, you can get creative with your bottles. i sometimes stick a funky label on mine or decorate the cap with colorful tape.
It's more about the vibes!
Garnish ideas: Think about adding a few drops of food coloring if you’re feeling adventurous. It doesn’t change the flavor, but seeing that vibrant liquid keeps the excitement alive!
Color combinations: Experiment with how the colors look in your bottles. A dazzling pink strawberry mix? Yes, please! A bit of aesthetics goes a long way even in the vape world.
Visual appeal tips: When displaying your new creations, snap some pics! A little Insta-worthy setup on your kitchen counter can inspire fellow vapers to try their own homemade vape flavors .
Storage & Make-Ahead Secrets
You’ve whipped up a tasty homemade vape flavor , but what's next? Let’s make sure your hard work lasts!
Storage guidelines: Store your e-liquids in a cool, dark place. Sunlight and heat can mess with the flavors and potency. A cupboard works!
Preservation methods: If you want to keep things fresh, using dark glass bottles helps. They block undesirable light!
Reheating instructions: You don’t need to reheat e-liquids, but if they’ve been sitting for a while, give them a good shake before use.
Freshness duration: Generally, your DIY creations can last for about 6 months if stored correctly. After that, the flavors might fade. So, enjoy them while they’re fresh!
Creative Variations for Your E-Liquid
Let's kick it up a notch and explore some exciting vape flavor combinations . After all, variety is the spice of life!
Flavor adaptations: Feeling bold? Mix a fruit flavor with a mint to create a refreshing twist! Strawberry mint or watermelon mint are real crowd-pleasers.
Dietary modifications: If you’re watching out for specific dietary needs, there are organic flavoring for vaping options that fit the bill. Just look for brands boasting all-natural ingredients.
Seasonal twists: Pumpkin spice in the fall? Yes, please! Switch it up with seasonal flavors; you can make something new every few months and keep your vaping experience fresh.
Regional variations: why not channel your inner food traveler? try making a tropical fruit blend using flavors inspired by different cultures.
Think about mixing coconut and pineapple for a little hawaiian vacation in your vape!
Complete Nutrition Guide
Let’s debunk some myths about vaping and nutrition.
Detailed breakdown: While e-liquids aren’t food, knowing what you're putting in your vape can help. Propylene glycol (PG) uses and vegetable glycerin (VG) benefits are essential for understanding what creates vapor.
Health benefits: Many find that switching to DIY nicotine e-liquid can be a healthier alternative to traditional smoking. Just remember to keep the nicotine levels in check if you decide to use it!
Dietary considerations: For those with allergies, always check the labels on flavoring.
Portion guidance: Start with small 30mL batches. You can always scale up once you find a combo you adore!
Expert FAQ Solutions
Got questions? I’ve been there. Here are answers to some common queries:
Common questions: What's the best base? You can't go wrong with a 50/50 mix of PG and VG for well-rounded flavor and vapor production!
Troubleshooting guide: If your vape is tasting burnt, it could be your coil. Change it out, and you’ll be surprised what a difference it makes.
Success tips: Track your ratios like I mentioned earlier. This way, you can recreate or tweak your favorite flavors easily.
Variations explained: If a flavor is too intense, dilute it slightly with your PG/VG base. You control the flavor intensity, so don’t stress!
Wrap-Up
So, there you have it! whether you're a newbie to creating e-liquid at home or a seasoned pro hunting for new flavored e-liquid recipes , this guide has you covered.
Just remember, vaping flavorful e-liquid in 10 minutes can open doors to an entire world of creativity and personalization.
Get started, have fun, and let those flavors flow. enjoy crafting your unique experience – you’ve got this!
Quick & Flavorful Homemade E-Liquid in 10 Minutes Card
⚖️ Ingredients:
- 15 mL Propylene Glycol (PG)
- 15 mL Vegetable Glycerin (VG)
- 3 mL food-grade flavoring (e.g., strawberry, vanilla, menthol)
- 1 mL Nicotine concentrate (optional)
🥄 Instructions:
- Step 1: Gather all ingredients and tools; ensure the area is clean.
- Step 2: Using a syringe, measure 15 mL of Propylene Glycol and pour it into the mixing bottle.
- Step 3: Measure 15 mL of Vegetable Glycerin and add it to the same bottle.
- Step 4: Measure 3 mL of your chosen food-grade flavoring and pour it into the mixture.
- Step 5: Measure out 1 mL of nicotine concentrate and add it to the mixture, following safety precautions.
- Step 6: Secure the cap on the mixing bottle and shake vigorously for about 30 seconds until well-combined.
- Step 7: Allow the mixture to sit for at least 5 minutes to enhance flavor integration (optional).
- Step 8: Use a vape device for testing, adjusting flavoring if needed.
- Step 9: Label the bottle with the flavor and date, and store it in a cool, dark place.
Previous Recipe: My Grandmother's Steeped Green Tea with Zesty Lemon Flavor: The Ultimate Refreshing Drink!
Next Recipe: How to Bake Football Cake: Delicious and Fun Treats for Game Day